Client Profiles in Aloha Data Collection
Managing Integrated Client Profiles

Integrated users should create all Client Profiles in Aloha PMS.
If you are using the Aloha PMS and DC integration, your DC Client Profiles will automatically be created in Aloha Data Collection!
You can confirm that a profile in Aloha Data Collection is synched with Aloha PM by viewing the below highlighted icon (a cloud with a check mark) next to the Client's name in the Client list in Organization Setup. Hovering over this icon will also show the status "Integrated."
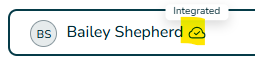
You can confirm that a profile in Aloha Data Collection is synched with Aloha PM by viewing the below highlighted icon (a cloud with a check mark) next to the Client's name in the Client list in Organization Setup. Hovering over this icon will also show the status "Integrated."
Once client profiles are synched from Aloha PM, there will be a few DC-specific fields to check and update
- Assigned Staff
- Staff/clients will automatically be linked if they are scheduled together on PMS.
- Within DC, any staff and client can be manually linked as well.
- Staff Assignment from PM does NOT synch to DC at this time
- Assigned Caregiver - Connect any DC Caregiver profile(s) to the client profile as desired.

If you wish to update any other field with the client's profile (e.g. Address, Alias, Phone number, etc), this edit should be made is Practice Management. Once saved in PM, the update will be reflected in the DC Profile.

If you have added an custom fields to your Client Profiles on Aloha PMS, please note that these will NOT show in Aloha DC. However, you can create your own custom fields within Aloha DC. The purpose of Custom Fields within a client profile is to house client information (e.g. medical record number) that may be needed for session documentation (e.g. Lesson Notes), or for internal reference.
Creating Non-Integrated (Stand-Alone) Client Profiles
If you are not using the Aloha PM-DC integration, you will need to create Staff Profiles manually in Aloha Data Collection.
NOTE: If you are using Aloha PMS and DC integration your Aloha DC client profiles will be automatically created.
If you plan to be integrated in the future, ensure that any Aloha DC Client Profile names and emails entered exactly match the client's profile created in Aloha PMS.
- From the navigation menu click on Organization Setup
- Select Clients from the drop down menu
- Add clients
- Fill in the Required Client information. Below is an image with the required fields highlighted.
After completing all mandatory and desired optional fields, click "Save." You will receive the following pop-up to confirm that you would like to create a Non-Integrated profile. If you wish to create a Non-Integrated profile, click "Create Anyway." If you wish to create an Integrated profile, click "Cancel" and create the profile in Aloha Practice Management.
After the profile has been create, you will see the following icon next to the client name (cloud with X in it). This icon is a visual indicator that the profile is not synched to a Practice Management profile.
Viewing / Editing an Existing Client Profile
If you would like to view a client profile navigate to the client list and select the edit button on the right end of the clients name
If you are viewing an Integrated profile, all fields except Assigned Staff and Assigned Caregiver will be locked from edits in the the DC profile. To edit any other parts of the profile, please make these edits in Aloha Practice Management. These edits will automatically be reflected in the Data Collection profile once saved in Practice Management.
If you are viewing a Non-Integrated profile, you will be able to make any desired edits.
Click  at the bottom when you are done or click the
 icon at the top left corner of the client profile to leave without saving any changes.