Motivity Integration - Setup
Aloha ABA and Motivity are now integrated with one another, allowing users to combine the practice management with their clinical data collection. Below are the steps to connect your Aloha ABA site to Motivity:
Initial Integration
We will need to add the External Subscription ID, which you will get from the Motivity site.
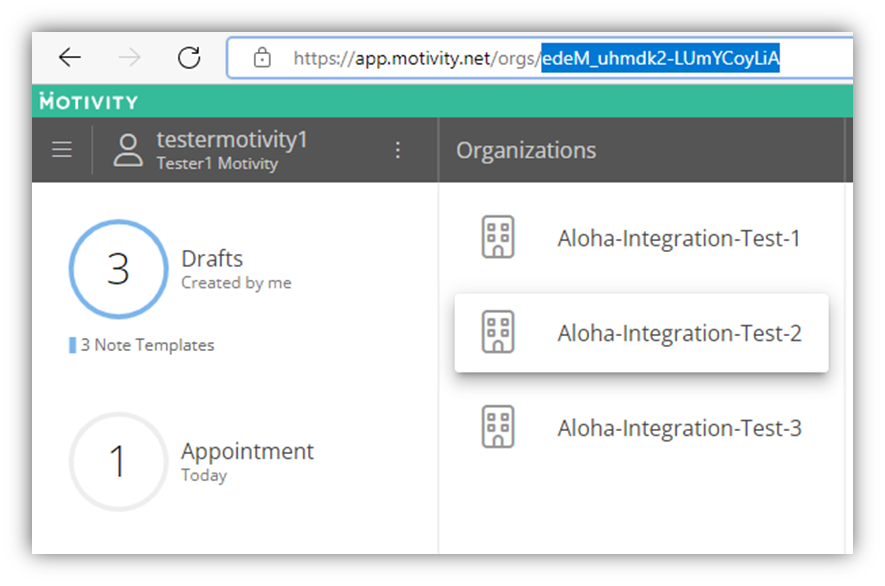
- Log into Motivity
- Settings > Organization > click on your Organization Name
- Copy the all the letters and numbers after the last backslash
- In Aloha navigate to Settings > System Settings > Clinical Integrations > Add Clinical Data Collection
- Click Settings > System Settings
- Scroll down to Clinical Integrations
- Select "Add Clinical Data Collection"
- Select "Motivity" in the dropdown menu
- Paste the ID into "External Subscription ID"
- Click "Connect and Save".

In Motivity
At this point, you need to go into Motivity and approve the connection for Aloha. To do this:
- Log into Motivity. Under Organization, select your organization
- Click Settings > Integrations
- Click Aloha, then "Approve".
- Motivity will appear in Aloha's "Clinical Integrations" section after the approval.

Once the two are connected, go back to "System Settings" and toggle on the options to "Auto update appointment info as per the Session Note" and "Auto Complete the Appointments" if you choose. These options will let Motivity information and session notes come back to Aloha to complete the session so your staff will not have to complete things in both systems.
Sync Staff and Clients
At this point, you need to sync the individual staff and clients from Motivity to Aloha. This will ensure that the data and profiles are matching across both platforms.
- In Aloha, click on Settings > Clinical Integrations > Motivity
- You will see the "Sync Management" screen. You can check the box next to staff names individually, or click the box next to "Status" to select all.
- Click "Match" to manually sync.
- If there is a blank space next to the staff name, type their name in and click "Save." This name you type should match the name that is entered in Motivity.
- Once staff and client profiles are synced, it should say "synced" next to their name.
- Make sure to complete for both staff and clients.
Staff and clients that are in Motivity, but not in Aloha can be added to Aloha by clicking "Add Staff/Client to Aloha" next to their name in sync management. However, staff/clients that are only in Aloha will need a profile created manually in Motivity.
Check Motivity
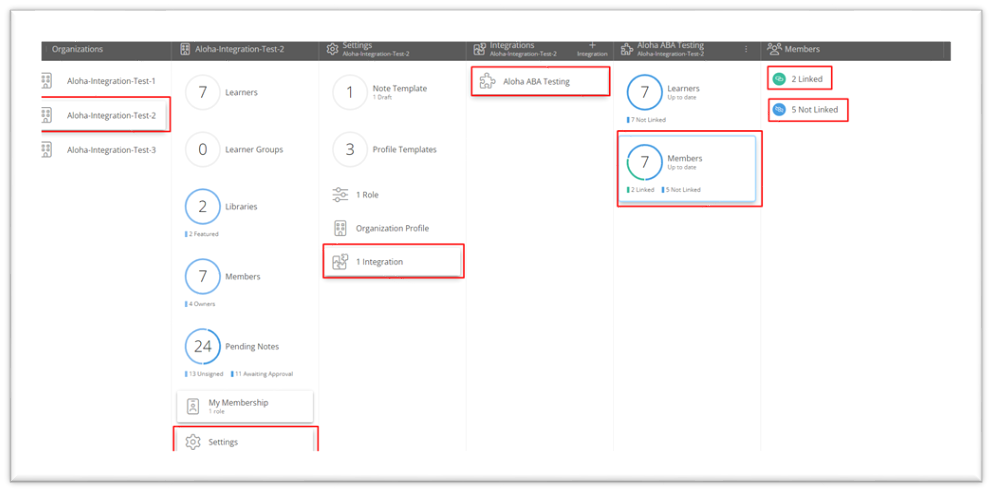
Users should double check that the syncing is complete from Motivity. To do this:
- On Motivity, go to Organization > Settings > Integration > Aloha
- Select either "Members" or "Learners". This will show you who is and is not linked yet.
Syncing Schedules
Check Previously Created Appointments
- On Aloha, Click Settings > Clinical Integrations > Motivity.
- You will see the "Sync Management" screen. Click the "Appointment" tab at the top.
- As long as both learners and staff are successfully synced, appointments should automatically sync as well.
- Within each individual appointment in the Aloha schedule, you should see an "M" icon in the top right corner to indicate that the appointments are linked to Motivity. You can learn more about the Motivity Icons in Motivity Icons in the Schedule.
Add New Appointments
- In Aloha, go to
and create/save an appointment between a synced staff/learner as usual.
- Log in to Motivity
- Click Appointments. You should see all your appointments reflected here.

Setting Staff Permissions to Complete Integration
Lastly, you want to give your staff access to the "Session Notes" on their calendars. To do this:
- In Aloha, click Settings > Security > User Roles.
- Select the User Roles for any of your service providers.
- Under Permissions, select Schedule > My Schedule > Session Notes and check the box for "Full Access"
- Save

Related Articles
Aloha/Motivity Integration FAQ and Troubleshooting
After setting up your Motivity integration with Aloha, you may find yourself running into a few issues. We've included this video to help you get a general sense of what the integration looks like between the two platforms and some common errors that ...Hi Rasmus Integration - Setup
Aloha ABA and Hi Rasmus are now integrated with one another, allowing users to combine the practice management with their clinical data collection. Below are the steps to connect your Aloha ABA site to Hi Rasmus. Initial Integration In Hi Rasmus: Log ...Ensora (Catalyst) Integration Set-up and Troubleshooting
Aloha ABA and Ensora are now integrated with one another, allowing users to combine the practice management piece to their clinical data collection. Below are the steps to connect your Aloha ABA site to Ensora: Establishing Connection between Aloha ...Stripe Integration
Stripe is a versatile payment platform that offers businesses and individuals the tools and services they need to accept and manage online payments. We're thrilled to announce our integration with Stripe at Aloha. This integration allows us to ...Office Ally Integration
Please follow the steps below to complete your Office Ally enrollment as well as EDI and ERA enrollment. Initial Account Set-up Step 1: Go to https://cms.officeally.com/AlohaABA and click Submit your claims today Step 2: Confirm you are signing up ...