Aloha Security Enhancement (Multi-Factor Authentication)
Aloha is implementing an important security enhancement for Multi-Factor Authentication.
To strengthen the security of your accounts, your site will be required to enable Multi-Factor Authentication (MFA). MFA adds an extra layer of protection by requiring you to verify your identity before logging in. This security enhancement will apply to all staff within your organization.
AlohaABA users will need to use Google Authenticator for this process. The app allows you to scan a QR code during login to link your AlohaABA account with Google Authenticator. Please see the steps below:
Setup Google Authenticator on your Phone
- Go to the App Store (iPhone) or Google Play Store (Android) and download the Google Authenticator App
. Once logged in, you will be asked to login to your email account.
- Login to AlohaABA with your normal username and password.
- A prompt to setup your authenticator will display. It will display the screen below to link your Google Authenticator app to Aloha if you haven’t downloaded it yet.
- You will click Set up account and then Scan Barcode in Google Authenticator and scan the QR code provided on the screen.
- There is also a link to manually link the accounts if you cannot scan the QR code.
d. Go back to Aloha and scan the QR code on the screen.
e. Click Next on the screen3. A new screen will display where you enter the 6-digit code from your Google Authenticator App.a. There is also a button to remember this device for 7 days.b. Click Done once the code is entered to login.c. If you are having issues with getting the six digit code, click Try another way to sign in
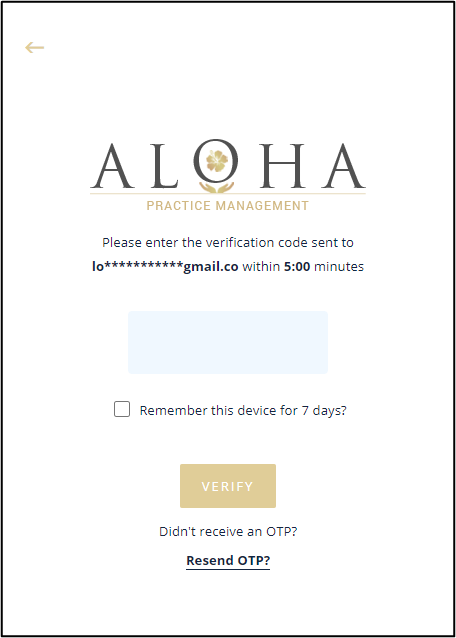
4. If Try another way to sign in was selected, an email will be sent to you with a 6 digit code to enter instead. The code will only be available for 5 minutes after being sent.a. There will be a checkbox to remember the device for 7 days here as well.
b. There is also a button at the bottom to resend the email to you as well.
'
Related Articles
Preparing for Aloha's Insurance Billing Services
Before you meet your assigned RCM manager from the Aloha Billing team, please complete the following steps: Required Steps to ensure accurate billing: Review the status of your payers on Office Ally or Availity and verify if they are ...Downloading and Saving Your Data from Aloha
This article outlines best practices for downloading and securely saving your data from Aloha for recordkeeping, audits, reporting, or general reference. We recommend periodically exporting key reports to ensure you have local copies of important ...Secondary Billing in AlohaABA
As of 7/3/24, our Secondary Billing feature will exclusively support Office Ally as the selected clearinghouse at this time. Secondary Billing cannot be completed with an Availity integration. As this feature is newly released, we recommend ...Generating Invoices (for Payers or Clients)
Go to the Billing > Generate Invoice. The top left corner has an option to generate an invoice for a payer or client. In order to generate an invoice for a payer or a client the sessions must be completed and billed in Aloha. By Payer Select this ...NEW Claim Fix in Aloha
As of July 2025, The ALOHA Fix Claim process is now located in AR Manager for a more streamlined workflow. The former claim fix section was removed. You are still able to fix claims directly in the clearinghouse or payer portal. Before we get ...